
“The Ultimate Gluten-Free & Vegan Christmas Cookie Recipes (Easy, Festive & Delicious)”
- SABA

- Dec 25, 2025
- 30 min read
Updated: Feb 5
There’s nothing quite like the delightful and comforting smell of fresh cookies baking during the enchanting Christmas season. The aroma wafts through the house, creating a warm and inviting atmosphere that instantly evokes feelings of nostalgia and joy. Whether you’re baking for family gatherings, sharing sweet treats with friends, or preparing thoughtful gifts for loved ones, these gluten-free and vegan Christmas cookie recipes are designed to be enjoyed by everyone, regardless of dietary restrictions.

Each recipe is carefully crafted to ensure that no one feels left out during the festive celebrations.
With simple and readily available ingredients, these recipes make the baking process not only accessible but also enjoyable. You can easily gather items like almond flour, coconut oil, maple syrup, and a variety of festive spices such as cinnamon and nutmeg, which are essential for creating that quintessential holiday flavor profile. The use of wholesome, plant-based ingredients not only enhances the taste but also contributes to a healthier alternative to traditional cookies, allowing you to indulge without the guilt.
The festive flavors incorporated into these cookies—think peppermint, gingerbread, and rich chocolate—capture the essence of the holiday season, making every bite a celebration. Additionally, the foolproof instructions provided with each recipe ensure that bakers of all skill levels can create delicious treats without stress or confusion. Whether you’re an experienced baker or trying your hand at cookie-making for the first time, these recipes guide you through each step, from mixing the dough to decorating the finished cookies with festive icing or sprinkles.
Moreover, the joy of baking during Christmas extends beyond just the cookies themselves; it’s about the memories created in the kitchen with loved ones. Imagine gathering around the counter, rolling out dough, cutting out shapes, and sharing laughter as you create beautiful, edible works of art together. This experience not only strengthens bonds but also instills a sense of tradition that can be passed down through generations.
In conclusion, these gluten-free and vegan Christmas cookie recipes are not just about satisfying your sweet tooth; they embody the spirit of the holidays, bringing people together through the joy of baking and sharing. So, roll up your sleeves, preheat the oven, and get ready to fill your home with the enticing scent of freshly baked cookies that everyone can enjoy this Christmas season.
Here’s a festive Christmas cookie collection with different styles, flavors, and textures, each with detailed, reliable recipes. These are classic holiday favorites that bake well, store well, and feel special for gifting 🎄🍪
1. Classic Christmas Sugar Cookies (Cut-Out Style)
Servings: 24–30 cookies (depending on size)
Prep Time: 20 minutes
Chill Time: 1 hour
Bake Time: 8–10 minutes
Total Time: ~1 hour 30 minutes
Perfect for decorating with icing

Ingredients
3 cups all-purpose flour, sifted to ensure a light texture and to avoid lumps that could affect the dough consistency.
½ tsp baking powder, which acts as a leavening agent to give the cookies a slight rise and lightness.
¼ tsp salt, enhancing the sweetness and balancing the flavors in the dough.
1 cup unsalted butter, softened at room temperature, allowing for easier creaming with sugar and providing a rich, creamy texture.
1 cup granulated sugar, which will sweeten the cookies and contribute to their delightful crispness.
1 large egg serves as a binder that adds moisture and richness to the cookie dough.
2 tsp vanilla extract, for a classic flavor that complements the sweetness of the cookies.
½ tsp almond extract (optional), which adds a subtle nutty flavor that enhances the overall taste profile of the cookies.
Instructions
In a large mixing bowl, whisk together the flour, baking powder, and salt until they are well combined. This step is crucial as it ensures even distribution of the leavening agent and salt throughout the flour.
In another bowl, cream the softened butter and granulated sugar together using an electric mixer on medium speed until the mixture is light and fluffy, which typically takes about 2 to 3 minutes. This process incorporates air into the butter, giving the cookies a tender texture.
Next, beat in the egg, followed by the vanilla extract and almond extract (if using). Mix until everything is well combined and the mixture is smooth.
Gradually add the dry ingredients to the wet mixture, mixing on low speed until a soft dough forms. Be careful not to overmix, as this can lead to tougher cookies.
Once the dough is formed, divide it into two halves. Wrap each half in plastic wrap and chill in the refrigerator for at least 1 hour. Chilling the dough is essential as it firms up the butter, making it easier to roll out and cut into shapes.
After chilling, lightly flour your work surface and roll out one half of the dough to a thickness of about ¼ inch. Ensure the surface and the rolling pin are adequately floured to prevent sticking.
Using cookie cutters, cut out shapes from the rolled dough and carefully transfer them to parchment-lined baking sheets. Leave some space between each cookie, as they may spread slightly while baking.
Bake the cookies in a preheated oven at 350°F (175°C) for 8–10 minutes. Keep a close eye on them; you want the edges to be set but the centers to remain soft. The cookies will continue to firm up as they cool.
for decorating.
Optional Icing
Once baked, remove the cookies from the oven and let them cool on the baking sheets for a few minutes before transferring them to a wire rack to cool completely. This step is crucial for achieving the perfect texture
2 cups powdered sugar, which will create a smooth and sweet icing that hardens as it dries.
2–3 tbsp milk, added gradually to achieve the desired consistency for the icing; use less for a thicker icing and more for a thinner drizzle.
½ tsp vanilla extract, which adds flavor to the icing and complements the cookies beautifully.
2. Gingerbread Cookies (Soft or Crisp)
Servings: 20–24 cookies
Prep Time: 20 minutes
Chill Time: 2 hours
Bake Time:
Soft: 8–10 minutes
Crisp: 11–12 minutes
Total Time: ~2 hours 30 minutes
Spiced and cozy holiday flavor

Ingredients
3 cups all-purpose flour
¾ tsp baking soda
¼ tsp salt
1 tbsp ground ginger
1 tbsp cinnamon
¼ tsp cloves
½ cup unsalted butter, softened to room temperature
¾ cup packed brown sugar, which adds a rich molasses flavor
⅔ cup molasses, preferably unsulfured for a deeper taste
1 large egg, which helps bind the ingredients together
Instructions
Begin by whisking together the dry ingredients in a large mixing bowl. This includes the all-purpose flour, baking soda, salt, ground ginger, cinnamon, and cloves. Make sure to mix them thoroughly to ensure that the spices are evenly distributed throughout the flour, which is essential for the perfect flavor balance in your cookies.
In a separate bowl, cream the softened unsalted butter and packed brown sugar together. Use an electric mixer on medium speed for about 2-3 minutes until the mixture is light and fluffy. This step is crucial as it incorporates air into the mixture, giving your cookies a nice texture. The brown sugar not only adds sweetness but also enhances the cookies' overall flavor profile with its rich, caramel notes.
Next, beat in the molasses and the egg into the butter and sugar mixture. The molasses adds a deep, rich flavor and contributes to the chewy texture of the cookies, while the egg provides moisture and helps bind everything together. Mix until well combined, ensuring there are no lumps.
Gradually add the dry ingredients to the wet mixture. It’s best to do this in batches to avoid a flour explosion and ensure that everything is well incorporated. Mix on low speed until just combined; be careful not to overmix, as this can lead to tough cookies.
Once your dough is mixed, it’s important to chill it for at least 2 hours. This step is crucial as it firms up the dough, making it easier to roll out and cut into shapes. Chilling also helps the flavors to meld together, resulting in a more flavorful cookie.
After chilling, roll out the dough on a lightly floured surface to a thickness of about ¼-inch. Use cookie cutters to cut out your desired shapes, whether they be traditional gingerbread men, festive stars, or holiday-themed ornaments. Place the cutouts on a baking sheet lined with parchment paper, ensuring they are spaced apart to allow for spreading during baking.
Bake the cookies in a preheated oven at 350°F. For soft gingerbread cookies, bake for 8–10 minutes, keeping a close eye on them to avoid overbaking. For a crispier texture, extend the baking time to 11–12 minutes. The cookies should appear set and slightly firm to the touch, but will continue to firm up as they cool.
Once baked, remove the cookies from the oven and allow them to cool on the baking sheet for a few minutes before transferring them to wire racks. This cooling step is important as it helps the cookies maintain their shape and prevents them from becoming too soft. Allow them to cool completely before decorating or storing.
3. Chocolate Crinkle Cookies
Servings: 22–26 cookies
Prep Time: 15 minutes
Chill Time: 4 hours (or overnight)
Bake Time: 10–12 minutes
Total Time: ~4 hours 30 minutes
Fudgy centers with crackled sugar tops

Ingredients
1 cup cocoa powder
2 cups sugar
½ cup vegetable oil
4 eggs
2 tsp vanilla extract
2 cups all-purpose flour
2 tsp baking powder
½ tsp salt
Powdered sugar for rolling, to create a generous coating
Instructions
Begin by combining the cocoa powder, granulated sugar, and vegetable oil in a large mixing bowl. Use a whisk or a sturdy spatula to mix these ingredients until they form a glossy, smooth mixture. This step is crucial as it helps to dissolve the sugar and incorporate air, which contributes to the overall texture of the cookies.
Next, add the eggs to the mixture, one at a time. It is important to beat each egg thoroughly before adding the next to ensure that each one is fully incorporated. This process will help to create a rich, fudgy consistency. After all the eggs are added, pour in the vanilla extract and mix until well combined, allowing the flavors to meld beautifully.
In a separate bowl, sift together the all-purpose flour, baking powder, and salt. Sifting these dry ingredients not only removes any lumps but also aerates the flour, which can lead to a lighter texture in the finished cookies. Gradually stir this dry mixture into the wet ingredients, mixing until just combined. Be careful not to overmix, as this can lead to tough cookies.
Once the dough is well mixed, it is essential to chill it to enhance the flavors and improve the texture. Cover the bowl with plastic wrap or transfer the dough to an airtight container and refrigerate for at least 4 hours or overnight. Chilling the dough will also make it easier to handle when rolling into balls.
After the chilling period, preheat your oven to 350°F. Prepare a baking sheet by lining it with parchment paper or a silicone baking mat. Using a cookie scoop or your hands, roll the chilled dough into small balls, about 1 inch in diameter. Once all the dough is shaped, generously coat each ball in powdered sugar, ensuring they are well covered. This will create the signature crackled appearance once baked.
Place the coated cookie balls on the prepared baking sheet, spacing them about 2 inches apart to allow for spreading during baking. Bake the cookies in the preheated oven for 10–12 minutes, or until the tops are set and have formed the characteristic crinkle pattern. The centers should remain soft and fudgy, so be careful not to overbake.
Once baked, remove the cookies from the oven and let them cool on the baking sheet for about 5 minutes. This resting time allows them to firm up slightly, making it easier to transfer them without breaking. Afterward, carefully transfer the cookies to a wire rack to cool completely. Enjoy these delightful treats with a glass of milk or your favorite beverage!
4. Peppermint Chocolate Thumbprint Cookies
Servings: 20–24 cookies
Prep Time: 20 minutes
Bake Time: 10–12 minutes
Cooling & Filling Time: 15 minutes
Total Time: ~45–50 minutes
Rich chocolate with festive mint

These delightful Peppermint Chocolate Thumbprint Cookies are a perfect blend of rich, decadent chocolate and refreshing peppermint, making them an ideal treat for holiday gatherings, festive occasions, or simply as a sweet indulgence to enjoy at home. The combination of flavors not only tantalizes the taste buds but also evokes a sense of nostalgia, reminiscent of winter celebrations and cozy evenings by the fire. The thumbprint design allows for a generous dollop of chocolate ganache or melted chocolate, which complements the crispness of the cookie and adds an extra layer of flavor. Each bite is a harmonious balance of sweetness and minty freshness, making these cookies irresistible.
Ingredients
1 cup butter, softened - The butter should be at room temperature to ensure it creams well with the sugar, resulting in a light and fluffy cookie base.
⅔ cup sugar - Granulated sugar adds sweetness and helps create a tender texture in the cookies.
1 egg yolk - The yolk adds richness and moisture, contributing to the overall flavor and texture of the cookie.
1 tsp vanilla - Pure vanilla extract enhances the chocolate flavor and adds a warm, aromatic quality to the cookies.
2 cups flour - All-purpose flour is the foundation of the cookie dough, providing structure and stability.
½ cup cocoa powder - Unsweetened cocoa powder gives these cookies their rich chocolate flavor and dark color.
¼ tsp salt - A small amount of salt helps to balance the sweetness and enhance the flavors of the other ingredients.
Crushed peppermint candies - These not only add a festive touch but also provide a delightful crunch and burst of minty flavor in every bite.
Chocolate ganache or melted chocolate - This serves as the decadent filling for the thumbprint, adding a luxurious finish to the cookies.
Instructions
Cream butter and sugar until light and fluffy. This process is crucial as it incorporates air into the mixture, which will help the cookies rise and become tender.
Add the egg yolk and vanilla extract to the creamed mixture, mixing until well combined. The egg yolk will enrich the dough, while the vanilla will infuse it with a lovely aroma.
Gradually mix in the flour, cocoa powder, and salt. Be careful not to overmix, as this can lead to tough cookies. Just mix until the dry ingredients are incorporated.
Roll the dough into small balls, approximately 1 inch in diameter. After rolling, gently roll the edges of each ball in the crushed peppermint candies, ensuring they are well-coated for that festive look and flavor.
Using your thumb or the back of a spoon, press a deep indentation into the center of each cookie ball. This thumbprint will hold the chocolate filling after baking.
Bake at 350°F for 10–12 minutes, or until the edges are set but the centers are still soft. Keep an eye on them to avoid overbaking, as you want a chewy texture.
Once baked, remove the cookies from the oven and allow them to cool on the baking sheet for a few minutes before transferring them to a wire rack. After they have cooled completely, fill the thumbprints with melted chocolate or chocolate ganache, allowing it to set slightly before serving.
These Peppermint Chocolate Thumbprint Cookies are not only a treat for the taste buds but also a visual delight, making them a perfect addition to any holiday cookie platter. The vibrant red and green of the crushed peppermint against the dark chocolate creates an eye-catching contrast that is sure to impress your guests. Enjoy these cookies with a cup of hot cocoa or a warm cup of tea for a cozy experience during the chilly months!
5. Snickerdoodles (Cinnamon Sugar Cookies)
Servings: 24–30 cookies
Prep Time: 15 minutes
Bake Time: 9–11 minutes
Total Time: ~30 minutes
Soft, chewy, and nostalgic

Snickerdoodles are not just any cookie; they are a delightful treat that evokes memories of childhood and warm kitchens filled with the sweet scent of baking. These cookies are characterized by their soft and chewy texture, which is complemented by a delightful coating of cinnamon sugar that adds a warm, spicy kick to the sweet base. The unique combination of flavors and textures makes snickerdoodles a beloved choice for cookie lovers of all ages.
Ingredients
2¾ cups all-purpose flour: The foundation of the cookie, providing structure and a soft base for the chewy texture.
2 tsp cream of tartar: This ingredient is essential for creating the signature tangy flavor and helps to achieve the perfect rise and texture.
1 tsp baking soda: A leavening agent that works in tandem with the cream of tartar to create the light and fluffy consistency that snickerdoodles are known for.
½ tsp salt: Enhances the sweetness of the cookies and balances the flavors, ensuring they are not overly sweet.
1 cup unsalted butter: Adds richness and moisture to the dough, contributing to the soft and chewy texture that makes these cookies irresistible.
1½ cups granulated sugar: Sweetens the dough and helps to create a crunchy exterior when rolled in cinnamon sugar.
2 large eggs: Provide moisture and structure, helping to bind the ingredients together and contributing to the overall texture of the cookies.
Rolling Mixture
¼ cup granulated sugar: Used for rolling the dough balls, adding a sweet crunch to the exterior of the cookies.
1½ tsp ground cinnamon: This aromatic spice is the star of the rolling mixture, providing that classic snickerdoodle flavor that pairs perfectly with the sweetness of the cookie.
Instructions
Begin by mixing the dry ingredients separately. In a medium bowl, whisk together the flour, cream of tartar, baking soda, and salt until well combined. This step ensures that the leavening agents are evenly distributed throughout the flour, which is crucial for achieving the desired texture of the cookies.
In a large mixing bowl, cream together the softened unsalted butter and granulated sugar until the mixture is light and fluffy. This process typically takes about 2-3 minutes using an electric mixer on medium speed. The creaming process incorporates air into the mixture, which helps to create a tender cookie.
Next, add the eggs to the butter and sugar mixture one at a time, mixing well after each addition. This will help to ensure that the eggs are fully incorporated, adding moisture and richness to the dough.
Gradually mix in the dry ingredients to the wet mixture, stirring until just combined. Be careful not to overmix, as this can lead to tougher cookies. The dough should be soft and slightly sticky, perfect for rolling.
Using clean hands, roll the dough into balls about 1 inch in diameter. Once shaped, roll each ball in the cinnamon sugar mixture until it is fully coated. This step not only adds flavor but also creates a beautiful, crackly exterior once baked.
Preheat your oven to 375°F. Line a baking sheet with parchment paper to prevent sticking and ensure even baking. Place the rolled dough balls on the prepared baking sheet, spacing them about 2 inches apart to allow for spreading.
Bake the cookies in the preheated oven for 9–11 minutes, or until the edges are set but the centers are still soft. This is key for achieving that chewy texture that snickerdoodles are famous for. Once baked, remove them from the oven and allow them to cool on the baking sheet for a few minutes before transferring them to a wire rack to cool completely. This cooling time helps to maintain the soft, chewy centers while the edges firm up slightly.
Enjoy your freshly baked snickerdoodles with a glass of milk or your favorite beverage, and savor the delightful blend of flavors and textures that this classic cookie has to offer. Whether you're baking for a special occasion or simply indulging in a sweet treat, snickerdoodles are sure to bring a smile to your face and warmth to your heart.
6. Linzer Cookies (Jam-Filled)
Servings: 18–22 sandwich cookies
Prep Time: 25 minutes
Chill Time: 1 hour
Bake Time: 10–12 minutes
Assembly Time: 10 minutes
Total Time: ~1 hour 45 minutes
Elegant and perfect for gifting

Linzer cookies, with their beautiful lattice designs and vibrant jam centers, are not just a treat for the taste buds but also a feast for the eyes. These delightful cookies are often associated with special occasions and celebrations, making them an ideal choice for gifting during holidays, birthdays, or simply as a thoughtful gesture to a friend. Their rich, buttery flavor, combined with the sweet and tangy fruit preserves, creates a harmonious balance that is both satisfying and indulgent. The intricate design of the cookies, featuring a peek of the jam through the cutout top, adds a touch of sophistication that elevates them from ordinary cookies to a gourmet delight.
Ingredients
2 cups all-purpose flour
¾ cup finely ground almond flour
½ tsp ground cinnamon
¼ tsp fine sea salt
1 cup unsalted butter, softened to room temperature
⅔ cup granulated sugar
1 large egg
1 tsp pure vanilla extract
Raspberry or apricot jam, or your favorite fruit preserve
Powdered sugar for dusting
These ingredients come together to create a cookie that is not only delicious but also has a delightful texture. The almond flour adds a nutty flavor and a tender crumb, while the spices enhance the overall taste profile. The choice of jam can be tailored to personal preference, allowing for endless variations of this classic cookie.
Instructions
In a medium bowl, combine the all-purpose flour, almond flour, ground cinnamon, and fine sea salt until well blended. This step ensures that the dry ingredients are evenly distributed, which is crucial for the texture of the cookies.
In a separate large mixing bowl, cream the softened unsalted butter and granulated sugar together using a hand mixer or stand mixer until the mixture is light and fluffy. This process incorporates air into the butter, creating a tender cookie.
Beat in the large egg and pure vanilla extract, mixing until fully incorporated. The egg adds richness and helps bind the ingredients together, while the vanilla provides a warm, aromatic flavor.
Gradually add the dry mixture to the wet ingredients, mixing until just combined. Be careful not to overmix, as this can lead to tough cookies.
Once the dough comes together, wrap it in plastic wrap and chill in the refrigerator for at least 1 hour. Chilling the dough helps to firm it up, making it easier to roll out and cut into shapes.
After chilling, roll the dough out on a lightly floured surface to about ¼ inch thick. Use cookie cutters to cut out matching shapes, ensuring that half of the cookies have a center cutout to showcase the jam.
Carefully transfer the cookies to a parchment-lined baking sheet, placing them about an inch apart. Cut centers out of half the cookies using a smaller cookie cutter or a knife.
Bake in a preheated oven at 350°F for 10–12 minutes, or until the edges are lightly golden. Keep an eye on them, as baking times can vary based on your oven and the thickness of the cookies.
Once baked, remove the cookies from the oven and let them cool completely on a wire rack. Spread a generous layer of raspberry or apricot jam on the solid cookies, then gently top with the cutout cookies to create a sandwich.
Finally, dust the tops of the cookies with powdered sugar for an elegant finish. This not only adds a touch of sweetness but also enhances their visual appeal.
🎁 Storage Tips
Most cookies can keep well for 7–10 days when stored in airtight containers at room temperature. This helps maintain their freshness and prevents them from becoming stale.
If you wish to make the cookies ahead of time, you can freeze the dough for up to 3 months. Just wrap it tightly in plastic wrap and place it in a freezer-safe bag. When ready to bake, simply thaw in the refrigerator overnight before rolling and cutting.
For decorated cookies, layer them carefully with parchment paper between each cookie to prevent sticking and preserve their delicate decorations.
These Linzer cookies are not only a delightful treat for yourself but also a thoughtful gift for loved ones. Their charming appearance and delicious flavor make them a cherished addition to any dessert platter or holiday cookie box.
“Best Gluten-Free & Vegan Christmas Cookies”
1. Gluten-Free Sugar Cookies (Cut-Out Friendly)
Servings: 20–24 cookies
Prep Time: 20 minutes
Chill Time: 1 hour
Bake Time: 9–11 minutes
Total Time: ~1 hour 30 minutes

Soft, sturdy, and perfect for icing
Ingredients
2½ cups gluten-free all-purpose flour (with xanthan gum) - This flour blend is crucial for achieving the ideal texture in gluten-free baking, providing the necessary structure and elasticity that mimic traditional wheat flour.
½ tsp baking powder - This leavening agent helps the cookies rise slightly, giving them a light and fluffy texture.
¼ tsp salt - A small amount of salt enhances the flavors of the ingredients, balancing the sweetness of the sugar and bringing out the richness of the butter.
¾ cup unsalted butter, softened - Softened butter is crucial for creaming with sugar, creating a light and airy mixture that contributes to the cookie's tender crumb.
¾ cup sugar - Granulated sugar not only sweetens the cookies but also helps with the texture, ensuring they have a delightful crunch on the outside and a soft interior.
1 egg - The egg acts as a binding agent, helping to hold the ingredients together while also adding moisture and richness to the dough.
2 tsp vanilla extract - Pure vanilla extract imparts a warm, aromatic flavor that complements the sweetness of the cookies, making them even more enjoyable.
Instructions
Begin by whisking together the gluten-free all-purpose flour, baking powder, and salt in a medium mixing bowl. This step ensures that the dry ingredients are evenly distributed, which is crucial for consistent baking results.
In a separate large bowl, cream together the softened unsalted butter and sugar. Use an electric mixer on medium speed to beat them until the mixture is light and fluffy, which typically takes about 3–5 minutes. This process incorporates air into the butter, creating a tender cookie texture.
Once the butter and sugar are well combined, add in the egg and vanilla extract. Beat the mixture on low speed until fully incorporated, ensuring that the egg is well blended into the buttery mixture.
Gradually mix in the dry ingredient mixture into the wet ingredients, using a spatula or wooden spoon. Stir until no flour streaks remain, being careful not to overmix, as this can lead to a denser cookie.
After the dough is combined, cover the bowl with plastic wrap or transfer it to an airtight container, and chill the dough in the refrigerator for at least 1 hour. Chilling the dough helps to firm it up, making it easier to roll out and cut into shapes.
Once the dough has chilled, preheat your oven to 350°F (175°C). Prepare a clean work surface by dusting it lightly with gluten-free flour to prevent sticking.
Roll out the chilled dough between two sheets of parchment paper to a thickness of approximately ¼ inch. This method prevents the dough from sticking to the rolling pin and makes it easier to lift the cut shapes onto the baking sheet.
Using cookie cutters of your choice, cut out shapes from the rolled dough. Carefully transfer the shapes to a baking sheet lined with parchment paper, ensuring that they are spaced apart to allow for even baking.
Bake the cookies in the preheated oven for 9–11 minutes, or until the edges are lightly golden. Keep a close eye on them, as baking times may vary based on your oven and the thickness of the cookies.
Once baked, remove the cookies from the oven and allow them to cool on the baking sheet for a few minutes before transferring them to a wire rack to cool completely. This step is important, as decorating warm cookies can cause the icing to melt and run.
After the cookies have cooled completely, they are ready to be decorated with your favorite icing or frosting, allowing you to unleash your creativity and make them visually appealing for any occasion.
2. Gluten-Free Gingerbread Cookies
Servings: 18–22 cookies
Prep Time: 20 minutes
Chill Time: 2 hours
Bake Time: 10–12 minutes
Total Time: ~2 hours 30 minutes

Spiced, classic holiday flavor
Ingredients
3 cups gluten-free flour blend: A combination of various gluten-free flours, such as almond flour, rice flour, and tapioca starch, can provide the perfect texture and flavor for these cookies.
¾ tsp baking soda: This leavening agent helps the cookies rise slightly and gives them a light, airy texture while baking.
¼ tsp salt: A small amount of salt enhances the flavors of the other ingredients and balances the sweetness of the cookies.
1 tbsp ginger: Freshly grated ginger or ground ginger can be used to impart that warm, spicy flavor characteristic of traditional gingerbread.
1 tbsp cinnamon: This aromatic spice adds a comforting warmth and sweetness to the cookies, making them a holiday favorite.
¼ tsp cloves: Ground cloves add a depth of flavor with their strong, slightly sweet, and bitter profile, complementing the other spices beautifully.
¾ cup brown sugar: The molasses content in brown sugar contributes to the rich flavor and color of the cookies, giving them that classic gingerbread taste.
½ cup butter: Softened butter is essential for a rich, creamy texture in the dough, resulting in tender, flavorful cookies.
⅔ cup molasses: This ingredient is key to achieving the deep, dark color and distinct flavor associated with gingerbread cookies. It also adds moisture to the dough.
1 egg: The egg acts as a binder, helping to hold the ingredients together and giving the cookies a nice structure.
Instructions
Combine dry ingredients: In a large mixing bowl, whisk together the gluten-free flour blend, baking soda, salt, ginger, cinnamon, and cloves until well combined. This step is crucial to ensure that the spices and leavening agent are evenly distributed throughout the flour.
Cream butter and sugar: In another bowl, beat the softened butter and brown sugar together until the mixture is light and fluffy. This process incorporates air into the butter, which helps to create a tender cookie. Make sure to scrape down the sides of the bowl to ensure everything is well combined.
Beat in molasses and egg: Add the molasses and egg to the creamed butter and sugar mixture. Mix until fully incorporated, ensuring that the molasses is evenly blended into the batter, which will contribute to the overall flavor and moisture of the cookies.
Mix in dry ingredients: Gradually add the dry ingredient mixture to the wet ingredients, stirring gently until just combined. Be careful not to overmix, as this can lead to denser cookies. The dough should be thick and slightly sticky.
Chill 2 hours: Cover the dough with plastic wrap or place it in an airtight container and refrigerate for at least two hours. Chilling the dough helps to firm it up, making it easier to roll out and cut into shapes. This step also allows the flavors to meld together, enhancing the overall taste of the cookies.
Roll, cut, and bake at 350°F for 10–12 minutes: Preheat your oven to 350°F (175°C). On a lightly floured surface (using gluten-free flour), roll out the chilled dough to about ¼ inch thick. Use cookie cutters to cut out your desired shapes. Place the cookies on a baking sheet lined with parchment paper. Bake in the preheated oven for 10 to 12 minutes or until the edges are firm and the centers are set. Allow them to cool on the baking sheet for a few minutes before transferring to a wire rack to cool completely.
VEGAN CHRISTMAS COOKIES
3. Vegan Chocolate Crinkle Cookies
Servings: 20–24 cookies
Prep Time: 15 minutes
Chill Time: 3–4 hours
Bake Time: 10–12 minutes
Total Time: ~4 hours

Fudgy, rich, and naturally festive
These Vegan Chocolate Crinkle Cookies are the perfect treat for any occasion, whether it’s a holiday gathering, a cozy afternoon snack, or a delightful dessert to impress your friends and family. With their irresistible fudgy texture and deep chocolate flavor, they are sure to satisfy any sweet tooth. The crinkle effect, achieved through rolling the dough in powdered sugar before baking, not only adds to their visual appeal but also creates a delightful contrast between the soft, chewy interior and the sweet, powdery exterior. Additionally, these cookies are completely plant-based, making them suitable for vegans and those with dairy allergies, allowing everyone to enjoy this delicious indulgence.
Ingredients
1 cup sugar
½ cup cocoa powder
¼ cup vegetable oil
¼ cup plant milk (such as almond, soy, or oat milk)
2 tsp vanilla extract
1¾ cups all-purpose flour
1½ tsp baking powder
¼ tsp salt
Powdered sugar (for rolling and coating)
When selecting your ingredients, opt for high-quality cocoa powder for a richer chocolate flavor. The choice of plant milk can also influence the final taste; for instance, almond milk adds a subtle nuttiness, while oat milk offers a creamier consistency. Ensure that your baking powder is fresh to achieve the best rise and texture in your cookies. The use of powdered sugar not only enhances the aesthetic but also contributes to the overall sweetness of each bite.
Instructions
In a large mixing bowl, combine the sugar, cocoa powder, vegetable oil, plant milk, and vanilla extract. Whisk these ingredients together until the mixture is smooth and well-blended, ensuring there are no lumps of cocoa powder remaining. This step is crucial as it forms the base of your cookie dough, infusing it with rich chocolate flavor and moisture.
Next, gradually stir in the all-purpose flour, baking powder, and salt. Use a spatula or wooden spoon to gently fold the dry ingredients into the wet mixture until just combined. Be careful not to overmix, as this can lead to a tougher cookie. The dough should be thick and slightly sticky, which is a good indication that it will bake into fudgy cookies.
Once your dough is prepared, cover the bowl with plastic wrap or a clean kitchen towel and chill it in the refrigerator for 3–4 hours. Chilling the dough is essential as it helps to firm it up, making it easier to roll into balls and enhancing the texture of the cookies when baked. This step also allows the flavors to meld together, resulting in a more delicious cookie.
After chilling, preheat your oven to 350°F. Line a baking sheet with parchment paper to prevent sticking and ensure even baking. Using a cookie scoop or your hands, roll the chilled dough into small balls, about 1 inch in diameter. Once formed, generously coat each ball in powdered sugar, ensuring they are fully covered. This coating will create the signature crinkle effect as the cookies bake and expand in the oven.
Place the sugar-coated dough balls on the prepared baking sheet, spacing them about 2 inches apart to allow for spreading. Bake in the preheated oven for 10–12 minutes, or until the edges are set but the centers remain soft. Keep a close eye on them, as baking times may vary slightly based on your oven. Once done, remove them from the oven and let them cool on the baking sheet for a few minutes before transferring them to a wire rack to cool completely.
These Vegan Chocolate Crinkle Cookies are best enjoyed fresh out of the oven, but they can also be stored in an airtight container at room temperature for several days. Their rich flavor and delightful texture make them a favorite among both vegans and non-vegans alike, proving that delicious treats can be made without animal products. Whether you’re sharing them at a gathering or enjoying them solo, these cookies are sure to bring joy and satisfaction to every bite.
4. Vegan Snickerdoodles
Servings: 22–26 cookies
Prep Time: 15 minutes
Chill Time: 30 minutes
Bake Time: 9–11 minutes
Total Time: ~55 minutes

Soft, chewy, cinnamon-coated cookies that are not only delicious but also completely plant-based, making them a perfect treat for anyone looking to enjoy a classic dessert without the use of animal products. These snickerdoodles are characterized by their delightful texture and rich flavor profile, featuring a warm cinnamon sugar coating that enhances their appeal. Ideal for sharing at gatherings, holiday celebrations, or simply as a sweet indulgence at home, these cookies are sure to impress both vegans and non-vegans alike.
Ingredients
2½ cups all-purpose flour - This forms the base of the cookies, providing structure and a soft, chewy texture. You can also experiment with gluten-free flour blends if you prefer a gluten-free option.
1 tsp baking soda - This leavening agent helps the cookies rise, giving them a light and airy quality while contributing to their overall texture.
½ tsp cream of tartar - Essential for that classic snickerdoodle tang, cream of tartar reacts with the baking soda to create a tender cookie and enhances the flavor.
¼ tsp salt - A crucial ingredient that balances the sweetness and enhances the overall flavor profile of the cookies.
¾ cup vegan butter - This provides the necessary fat for moisture and richness. You can use store-bought vegan butter or make your own using coconut oil or other plant-based fats.
1 cup sugar - Granulated sugar adds sweetness and contributes to the cookie's texture. Consider using organic sugar to ensure it is vegan-friendly.
¼ cup plant milk - Any unsweetened plant-based milk, such as almond, soy, or oat milk, works well to bind the ingredients together and add moisture.
1 tsp vanilla extract - This adds depth of flavor and a lovely aroma to the cookies, enhancing the overall taste experience.
Rolling Mix
¼ cup sugar - Used for rolling the cookies, this sugar will caramelize slightly during baking, creating a sweet crust.
1½ tsp cinnamon - The star spice of this recipe, cinnamon adds warmth and a comforting flavor that is synonymous with snickerdoodles.
Instructions
Begin by mixing the dry ingredients in a large bowl. Combine the flour, baking soda, cream of tartar, and salt, ensuring they are well blended. This step is crucial as it evenly distributes the leavening agents throughout the flour.
In a separate bowl, cream together the vegan butter and sugar until the mixture is light and fluffy. This process incorporates air into the mixture, which contributes to the cookie's texture. Use an electric mixer for best results, but a whisk and some elbow grease will also work.
Once the butter and sugar are well combined, add the plant milk and vanilla extract to the mixture. Stir until fully incorporated, ensuring that the wet ingredients are evenly mixed with the creamed butter and sugar.
Gradually stir the dry ingredients into the wet mixture. Mix until just combined; be careful not to overmix, as this can lead to denser cookies. The dough should be soft and slightly sticky.
Chill the dough in the refrigerator for at least 30 minutes. This step is important as it helps the cookies maintain their shape during baking and enhances their flavor as the ingredients meld together.
Preheat your oven to 375°F. While the oven is heating, prepare the rolling mix by combining the sugar and cinnamon in a small bowl.
Once the dough is chilled, scoop out tablespoon-sized portions and roll them into balls. Then, roll each ball in the cinnamon sugar mixture until fully coated. This creates the signature snickerdoodle crust that is both sweet and aromatic.
Place the rolled dough balls on a baking sheet lined with parchment paper, ensuring they are spaced apart to allow for spreading. Bake in the preheated oven for 9–11 minutes, or until the edges are lightly golden and the centers are set. The cookies will continue to firm up as they cool.
GLUTEN-FREE + VEGAN (BOTH)
5. Almond Flour Shortbread Cookies
Servings: 16–20 cookies
Prep Time: 10 minutes
Chill Time: 20 minutes
Bake Time: 10–12 minutes
Total Time: ~40 minutes
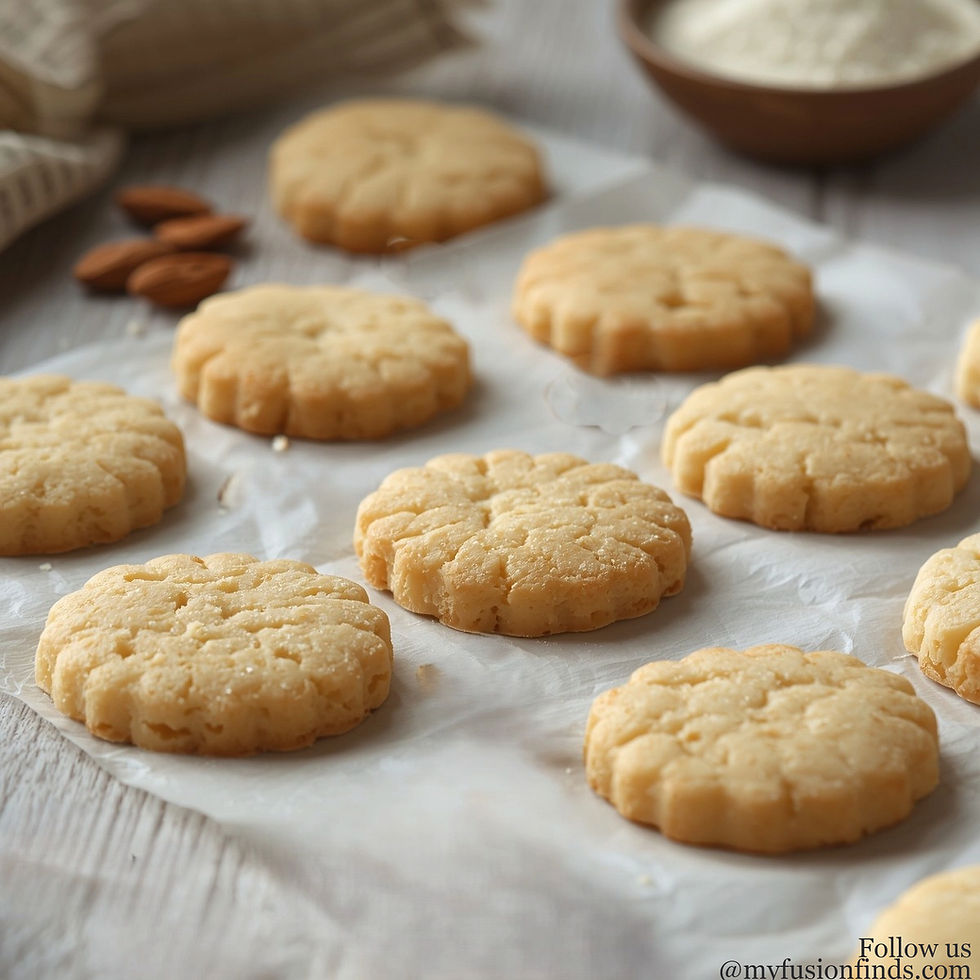
Naturally gluten-free and vegan
These delightful almond flour shortbread cookies are not only a treat for the taste buds but also cater to those with dietary restrictions, being both gluten-free and vegan. The use of almond flour gives these cookies a rich, nutty flavor and a wonderfully crumbly texture that melts in your mouth. Whether you’re enjoying them with a cup of tea, serving them at a gathering, or simply indulging in a sweet snack, these cookies are sure to impress.
Ingredients
2½ cups almond flour
¼ cup coconut oil, melted
⅓ cup maple syrup
1 tsp vanilla extract
Pinch of salt
Each ingredient plays a crucial role in achieving the perfect cookie. The almond flour not only provides a gluten-free base but also enriches the cookies with healthy fats, protein, and essential nutrients. Coconut oil serves as a wonderful dairy-free alternative to butter, lending a subtle sweetness and moisture to the dough. Maple syrup acts as a natural sweetener, giving the cookies a delightful flavor while keeping them refined sugar-free. A hint of vanilla extract enhances the overall taste, while a pinch of salt balances the sweetness, making every bite a harmonious experience.
Instructions
Begin by mixing all the ingredients in a large mixing bowl. Use a spatula or your hands to combine the almond flour, melted coconut oil, maple syrup, vanilla extract, and salt until a cohesive dough forms. The dough should be slightly sticky but manageable.
Once the dough is well combined, cover the bowl with plastic wrap or a clean kitchen towel and chill it in the refrigerator for 20 minutes. Chilling the dough is an essential step, as it helps to firm up the coconut oil, making it easier to shape the cookies and ensuring they hold their form during baking.
After the chilling period, remove the dough from the refrigerator. You can either roll it into small balls or use a fork to flatten the dough into cookie shapes. If you choose to roll them into balls, aim for about 1 inch in diameter, as they will spread slightly during baking.
Preheat your oven to 350°F (175°C). Line a baking sheet with parchment paper to prevent sticking and to facilitate easy clean-up. Place the shaped cookies on the prepared baking sheet, leaving enough space between each cookie to allow for slight spreading during baking. Bake in the preheated oven for 10–12 minutes, or until the edges are lightly golden. Keep a close eye on them, as almond flour can brown quickly.
Once baked, remove the cookies from the oven and allow them to cool on the baking sheet for a few minutes before transferring them to a wire rack. It’s important to let them cool fully, as they will continue to firm up as they cool down. Enjoy these cookies as they are, or feel free to dust them with a little powdered sugar or dip them in dark chocolate for an extra indulgent treat!
These almond flour shortbread cookies are not just easy to make but also versatile. You can customize them by adding your favorite mix-ins, such as chopped nuts, dried fruits, or even a sprinkle of cinnamon for added warmth. They make for a perfect snack or dessert that everyone can enjoy, regardless of dietary preferences. Enjoy baking and savoring these delightful cookies!
6. Gluten-Free Vegan Thumbprint Cookies
Servings: 18–22 cookies
Prep Time: 15 minutes
Bake Time: 11–13 minutes
Cooling & Filling Time: 10 minutes
Total Time: ~40 minutes

Perfect for jam centers
Ingredients
2 cups gluten-free flour, preferably a blend that includes almond flour or coconut flour for added flavor and texture.
½ tsp baking powder, which helps the cookies rise and achieve a light, fluffy texture.
¼ tsp salt, to enhance the sweetness and balance the flavors in the cookies.
½ cup vegan butter, softened to room temperature, which provides richness and a buttery flavor without the use of dairy.
½ cup sugar, granulated or coconut sugar, to sweeten the cookies and create a delightful contrast with the tartness of the jam.
¼ cup plant milk, such as almond milk, soy milk, or oat milk, to bind the ingredients together and keep the cookies moist.
1 tsp vanilla extract, which adds a warm, aromatic flavor that complements the sweetness of the cookies.
Fruit jam, such as raspberry, strawberry, or apricot, for the center filling, providing a burst of fruity flavor that contrasts beautifully with the cookie base.
Instructions
In a large mixing bowl, cream together the softened vegan butter and sugar until the mixture is light and fluffy. This process incorporates air into the butter, which is crucial for achieving a tender cookie texture.
Gradually add the plant milk and vanilla extract to the creamed mixture, stirring until fully combined. The addition of plant milk not only helps to moisten the dough but also allows for easy incorporation of the dry ingredients in the next step.
In a separate bowl, whisk together the gluten-free flour, baking powder, and salt. Once mixed, gradually add the dry ingredients to the wet mixture, stirring gently until a dough forms. Be careful not to overmix, as this can lead to a denser cookie.
Once the dough is prepared, scoop out portions and roll them into balls about 1 inch in diameter. Place the dough balls on a lined baking sheet. Using your thumb or the back of a spoon, gently press down in the center of each ball to create a thumbprint indentation, ensuring there is enough space for the jam filling.
Fill each thumbprint with your choice of fruit jam, taking care not to overfill, as the jam may bubble over during baking. The jam will provide a sweet and tangy contrast to the buttery cookie base, making each bite delightful.
Preheat your oven to 350°F. Once heated, bake the cookies for 11–13 minutes, or until the edges are lightly golden. Keep an eye on them to prevent overbaking, as gluten-free cookies can quickly become dry if left in the oven too long.
🎁 Holiday Baking Tips (GF & Vegan)
Chill the dough longer than usual for a better structure. When working with gluten-free and vegan doughs, chilling is crucial. This process allows the fats to solidify, which helps the cookies maintain their shape during baking. Consider chilling the dough for at least 30 minutes to an hour, or even overnight if your schedule allows. This extended chilling time not only enhances the texture of the cookies but also allows the flavors to meld together, resulting in a more delicious final product.
Use parchment paper for best results. Lining your baking sheets with parchment paper is essential, especially for gluten-free and vegan recipes. This not only prevents the cookies from sticking but also promotes even baking and browning. Additionally, parchment paper can make for an easier cleanup process, allowing you to simply lift the paper off the baking sheet once the cookies are done. For extra assurance against sticking, consider using a light spray of cooking oil on the parchment paper before placing the dough on top.
Let cookies cool fully before moving (especially GF). Gluten-free cookies often have a different texture compared to their traditional counterparts, making them more delicate and prone to breaking. It’s important to allow the cookies to cool on the baking sheet for at least 10 minutes before attempting to transfer them to a wire rack. This cooling period allows them to firm up and set properly, ensuring that they retain their shape and do not crumble when moved. Patience during this step will reward you with perfectly baked cookies that are both beautiful and delicious.
Store with parchment between layers. To maintain the freshness and prevent your cookies from sticking together, it’s advisable to store them with layers of parchment paper in between. This simple technique creates a barrier that keeps the cookies intact while also allowing for easy access whenever you want to enjoy a treat. For optimal freshness, store the cookies in an airtight container at room temperature, and consider adding a slice of bread to help keep them soft and chewy. If you plan to keep them for an extended period, freezing them with parchment layers can preserve their quality for weeks.


👍