


Delicious Restaurant-Style Chicken Recipes You Can Make at Home

Here are restaurant-style chicken recipes inspired by fast food favorites like KFC fried chicken and shawarma, but made at home with clear, step-by-step instructions.
KFC-Style Crispy Fried Chicken (Ultra Crunchy)

Ingredients:
Chicken pieces (drumsticks/thighs)
2 cups buttermilk
1 egg
Coating:
2 cups flour
1 tsp paprika
1 tsp garlic powder
1 tsp onion powder
1 tsp black pepper
1 tsp salt
½ tsp thyme
½ tsp oregano
instruction
Marinate:
Begin by mixing buttermilk and egg in a large bowl. The buttermilk adds a rich flavor and tenderizes the chicken, while the egg helps the coating adhere better during frying.
Once thoroughly combined, immerse the chicken pieces in the marinade, ensuring they are completely covered. For optimal flavor infusion and tenderness, allow the chicken to soak for at least 4 hours; however, for the best results, marinating overnight is highly recommended. This extended time allows the flavors to penetrate deeply into the meat, resulting in a juicier and more flavorful final dish.
Prepare coating:
In a separate mixing bowl, combine all-purpose flour with a selection of spices that you prefer, such as paprika, garlic powder, onion powder, salt, and pepper. The combination of these spices will not only enhance the flavor of the coating but also contribute to the overall aroma of the fried chicken. Mix the dry ingredients thoroughly to ensure an even distribution of spices throughout the flour.
Double coating (secret to KFC crunch):
After the marinating period, carefully remove the chicken from the buttermilk mixture, allowing any excess marinade to drip off. Next, take each piece of chicken and coat it generously in the seasoned flour mixture, ensuring that every surface is covered.
For the secret to achieving that iconic KFC-style crunch, dip the coated chicken back into the buttermilk briefly, and then coat it once again in the flour mixture. This double coating technique creates a thicker, crunchier crust that will hold up beautifully when fried, providing that satisfying crunch with each bite.
Fry:
In a large, deep frying pan or a deep fryer, heat oil to a temperature of 175°C (350°F). It is crucial to use a thermometer to monitor the oil temperature, as frying at the correct temperature ensures that the chicken cooks evenly and the coating becomes golden brown and crispy.
Carefully place the coated chicken pieces into the hot oil, taking care not to overcrowd the pan, as this can lower the oil temperature and result in greasy chicken. Fry the chicken for approximately 12–15 minutes, turning occasionally, until it is golden brown on the outside and cooked through on the inside. To ensure thorough cooking, you can check the internal temperature of the chicken, which should reach at least 75°C (165°F).
Rest:
Once the chicken is cooked to perfection, remove it from the oil and place it on a wire rack instead of paper towels. This method allows air to circulate the chicken, preventing the bottom from becoming soggy and helping to maintain that delightful crispy texture that is so desirable in fried chicken.
Pro tips:
For an extra layer of crunch, consider adding a small amount of the marinade to the flour mixture. This will create crispy flakes that enhance the texture of the coating.
Be mindful not to overcrowd the pan while frying. Frying too many pieces at once can lower the oil temperature significantly, leading to uneven cooking and less crispy chicken. It’s better to fry in batches to ensure each piece is perfectly cooked and golden brown.
Chicken Shawarma (Street-Style Wrap)

Ingredients:
500g chicken thighs (more juicy than breast)
3 tbsp yogurt
2 tbsp olive oil
3 garlic cloves
1 tsp paprika
1 tsp cumin
1 tsp coriander
½ tsp turmeric
Lemon juice
instruction
Marinate:
Begin by preparing a flavorful marinade that will infuse the chicken with rich tastes. In a mixing bowl, combine thick yogurt, which serves as a tenderizing agent, with a variety of spices such as cumin, paprika, turmeric, and coriander. These spices not only contribute to the flavor but also add vibrant color to the dish.
To enhance the marinade, add minced garlic, which provides a robust aroma and depth of flavor. Incorporate a drizzle of oil, preferably olive oil, to help the spices adhere to the chicken and to promote even cooking. Finally, squeeze in fresh lemon juice, which adds acidity and brightness to the marinade.
Once the marinade is well mixed, take your chicken pieces—whether they are breasts, thighs, or a combination—and thoroughly coat them in the marinade. Ensure that each piece is evenly covered to maximize flavor absorption. For optimal results, allow the chicken to marinate for a minimum of 2 hours; however, marinating overnight is highly recommended as it allows the flavors to penetrate deeply into the meat, resulting in a more succulent and aromatic dish.
Cook:
When ready to cook, preheat your oven to 200°C (about 400°F). Place the marinated chicken on a baking tray lined with parchment paper for easy cleanup. Bake in the preheated oven for approximately 25 minutes, or until the chicken is fully cooked through and has reached an internal temperature of 75°C (165°F).
Alternatively, if you prefer a stovetop method, heat a skillet or frying pan over medium-high heat. Add a splash of oil to the pan and once hot, carefully place the marinated chicken pieces in the pan. Cook for several minutes on each side until the chicken is beautifully browned and cooked to perfection. This method will give the chicken a delightful crispy exterior while keeping the inside juicy.
Slice:
After cooking, allow the chicken to rest for a few minutes to retain its juices. Then, using a sharp knife, slice the chicken into thin strips, mimicking the style of street shawarma. This technique not only enhances the presentation but also makes it easier to wrap the chicken in flatbread later on.
Assemble wrap:
To create a delicious wrap, begin with a piece of soft flatbread, such as pita or lavash. Lay it flat on a clean surface to prepare for filling.
Next, add a generous portion of the sliced chicken in the center of the flatbread. Follow this with fresh, crisp lettuce, diced tomatoes, and thinly sliced onions for a refreshing crunch and added flavor.
To elevate the taste, drizzle your choice of sauce over the top. A popular option is a creamy garlic sauce or a tangy yogurt sauce, which complements the spices in the chicken beautifully. Be sure to add enough sauce to enhance the overall flavor without making the wrap too soggy.
Optional sauce (quick garlic sauce):
For a quick and easy garlic sauce, simply mix thick yogurt with minced garlic, a splash of lemon juice, and a pinch of salt. This sauce offers a perfect balance of creaminess and tang, making it an ideal accompaniment for your chicken wrap.
Spicy Chicken Wings (Restaurant Bar Style)

Ingredients:
Chicken wings
1 tbsp oil
Salt & pepper
Sauce:
3 tbsp hot sauce
1 tbsp butter
1 tsp honey
instruction
Preheat your oven to 220°C. This high temperature is crucial for achieving that perfect crispy texture on the chicken wings. Make sure to allow the oven to fully reach this temperature before placing the wings inside, as this will help them cook evenly and develop a deliciously crunchy exterior.
In a large mixing bowl, toss the chicken wings with a generous amount of oil, salt, and pepper. The oil not only helps the seasonings adhere to the wings but also contributes to their crispiness during baking. Use enough salt to enhance the natural flavor of the wings, and freshly ground black pepper to add a bit of spice. Ensure that each wing is evenly coated for the best flavor.
Place the seasoned wings on a baking tray lined with parchment paper or directly on a baking sheet. Bake for 40–45 minutes in the preheated oven, flipping the wings halfway through the cooking time to ensure they are evenly crispy on all sides. Keep an eye on them towards the end of the cooking time, as ovens can vary, and you want to avoid overcooking or burning the wings. The goal is to achieve a beautiful golden-brown color and a crunchy texture.
While the wings are baking, prepare the sauce by melting a stick of butter in a saucepan over low heat. Once the butter is fully melted, mix in your favorite hot sauce along with a drizzle of honey. The hot sauce adds the necessary heat and flavor, while the honey balances it out with a touch of sweetness, creating a delightful blend that will coat the wings beautifully. Stir the mixture well until all ingredients are thoroughly combined.
Once the wings are done baking and have reached that desired level of crispiness, remove them from the oven and transfer them to a large mixing bowl. Pour the prepared sauce over the hot wings, making sure to coat them evenly. Use tongs or a spatula to toss the wings gently but thoroughly in the sauce, ensuring that every wing is generously covered in the spicy, buttery mixture.
Serve the wings hot, garnished with chopped green onions or a sprinkle of sesame seeds if desired, for an extra touch of flavor and presentation. Pair them with your favorite dipping sauces, such as ranch or blue cheese, and enjoy them as a delicious appetizer or main dish. These wings are perfect for game day, parties, or any casual gathering where finger foods are appreciated.
For extra crispiness: bake on a rack. This allows air to circulate through the wings, preventing them from sitting in their own juices and ensuring a more evenly crisped surface.
Crispy Chicken Burger (Fast-Food Style)
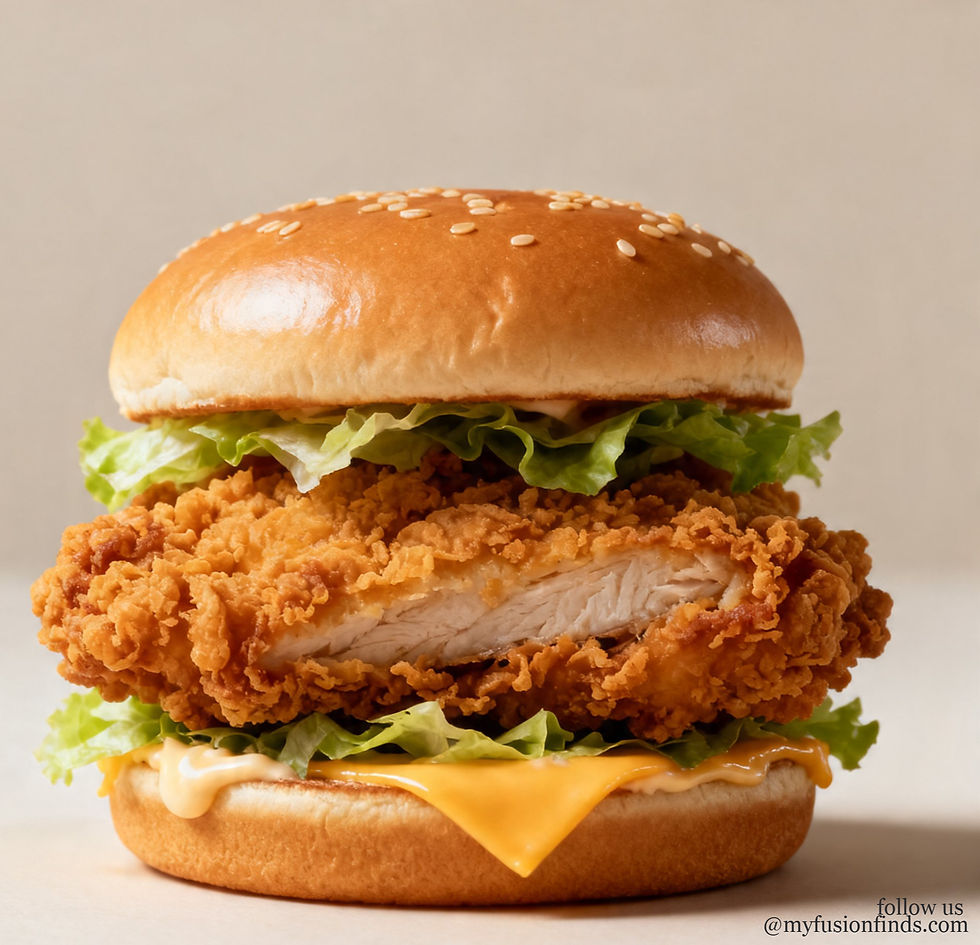
Ingredients:
Chicken breast (flattened)
Burger buns
Lettuce, pickles
Mayo or sauce
Coating:
Flour + paprika + garlic powder + salt
1 egg
Breadcrumbs
instruction
Season chicken. Start by selecting fresh, high-quality chicken breasts or thighs. Pat them dry with paper towels to remove excess moisture, which helps the seasoning stick better. Use a blend of spices such as salt, pepper, garlic powder, paprika, and any other preferred herbs to enhance the flavor. Rub the seasoning generously over the chicken, ensuring an even coating. Let the seasoned chicken rest for at least 15-30 minutes to allow the flavors to penetrate the meat.
Dip in flour → egg → breadcrumbs. Prepare a breading station by setting up three shallow dishes. In the first dish, add all-purpose flour seasoned with a bit of salt and pepper. In the second dish, beat a couple of eggs until well combined. In the third dish, place your breadcrumbs, which can be plain or seasoned for added flavor. Begin by taking each piece of seasoned chicken and dredging it in the flour, ensuring it's fully coated. Shake off any excess flour before dipping it into the egg mixture, allowing the egg to adhere properly. Finally, coat the chicken in breadcrumbs, pressing gently to ensure a good layer adheres to the surface. This triple-dipping process creates a crispy and flavorful crust once fried.
Fry until golden and crispy. Heat a generous amount of oil in a large skillet over medium-high heat. The oil should be hot enough that a breadcrumb dropped into it sizzles immediately. Carefully place the breaded chicken pieces into the hot oil, ensuring not to overcrowd the pan, which can lower the oil temperature and result in soggy chicken. Fry the chicken for about 4-6 minutes on each side, or until it turns a beautiful golden brown and reaches an internal temperature of 165°F (75°C). Use a slotted spoon to remove the chicken from the pan and place it on a plate lined with paper towels to absorb any excess oil.
Toast buns lightly. While the chicken is frying, prepare your buns. Choose your favorite type of bun, such as brioche, potato, or whole grain, depending on your preference. Preheat a separate skillet or griddle over medium heat. Place the buns cut-side down on the skillet and toast them for a few minutes until they are golden brown and slightly crispy. This step adds texture and prevents the buns from becoming soggy when assembled with the chicken and sauce.
Assemble: bun + sauce + chicken + toppings. Begin the assembly process by spreading your choice of sauce on the bottom half of the toasted bun. Popular options include mayonnaise, spicy aioli, barbecue sauce, or a tangy mustard. Next, place the crispy fried chicken on top of the sauce. Add your favorite toppings, which could include lettuce, tomato slices, pickles, onions, or even jalapeños for a kick of heat. Finally, cap it off with the top half of the bun, pressing down gently to secure all the delicious layers together.
Add cheese for extra indulgence. For those who enjoy a richer flavor and creaminess, consider adding a slice of cheese. Cheddar, Swiss, or pepper jack are excellent choices that melt beautifully over the hot chicken. Place the cheese on the chicken just before it finishes frying, allowing it to melt slightly before assembling the sandwich. This addition not only enhances the taste but also contributes to a delightful gooey texture that complements the crispy chicken perfectly.
Chicken Tikka (Restaurant Indian Style)

Ingredients:
500g chicken
1 cup yogurt
2 tsp tikka masala spice
1 tsp paprika
1 tbsp lemon juice
1 tbsp oil
instruction
Begin by carefully measuring and mixing all the marinade ingredients in a large bowl. This typically includes components such as olive oil, lemon juice, minced garlic, and a variety of spices like cumin, paprika, and salt. Whisk these ingredients together until they are well combined, creating a smooth and flavorful marinade that will enhance the taste of the chicken.
Next, take your chicken pieces, which can be boneless breasts, thighs, or even cubes of chicken, and add them to the marinade. Ensure that each piece is thoroughly coated with the mixture. For optimal flavor absorption, allow the chicken to marinate in the refrigerator for a minimum of 2 to 4 hours. If time permits, marinating overnight can greatly enhance the depth of flavor, allowing the spices and herbs to penetrate the meat more effectively.
Once the marinating process is complete, it's time to skewer the chicken pieces. Thread the marinated chicken onto skewers, making sure to leave a little space between each piece to allow for even cooking. If you’re using wooden skewers, consider soaking them in water for about 30 minutes beforehand to prevent them from burning on the grill or in the oven.
Preheat your grill or oven to a temperature of 220°C (about 425°F). Place the skewered chicken on the grill or a baking tray lined with parchment paper if you're using the oven. Cook the chicken for approximately 20 minutes, turning occasionally to ensure even cooking. The chicken should reach an internal temperature of 75°C (165°F) to ensure it is fully cooked and safe to eat.
For an authentic flavor profile, consider slightly charring the chicken at the end of the cooking process. This can be achieved by increasing the heat for the last few minutes or by placing the skewers directly over the flames if you're grilling. The charred bits add a delightful smokiness and depth of flavor that elevates the dish.
To complement the grilled chicken skewers, serve with a refreshing mint yogurt sauce. This sauce can be made by mixing plain yogurt with chopped fresh mint, a squeeze of lemon juice, and a pinch of salt. This cooling dip not only enhances the flavors of the chicken but also adds a creamy texture that balances the spices beautifully.


Comments